2.安装node.js
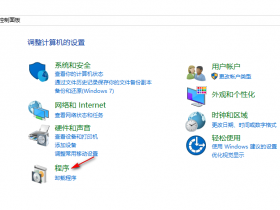
打开Node版本管理器

更新一下版本列表

安装最新稳定版

安装好后,将命令行版本设置为刚刚安装的版本

3.新建项目目录
宝塔面板点击"文件",新建一个文件夹用来放我们的next.js项目

这里我新建了一个my-next-app文件夹(文件夹名称可以自定义)

4.pm2配置
在本地电脑项目目录下新建一个ecosystem.config.js文件,这个文件是pm2的配置文件,我们服务器上的next.js项目需要通过pm2来运行
apps: [
{
name: "my-next-app",
script: "npm",
args: "start",
env: {
NODE_ENV: "production",
},
},
],
};
5.用github来管理项目
首先在github新建一个仓库

在本地电脑终端中执行下图中的命令,将本地项目推送到github上

git add README.md
git commit -m "first commit"
git branch -M main
git remote add origin https://github.com/yourname/test2.git
git push -u origin main
6.配置SSH访问
为了允许 GitHub Actions 通过 SSH 连接到你的服务器,需要在服务器上生成 SSH 密钥对,并将公钥添加到服务器的 ~/.ssh/authorized_keys 文件中。
在服务器上生成 SSH 密钥对:
将生成的公钥添加到 ~/.ssh/authorized_keys:
查看公钥:

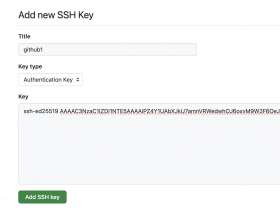
将公钥添加到github,点击Settings -> SSH and GPG keys -> New SSH key

7.在服务器上运行next.js项目
首先切换到项目目录下,把github上的代码拉取到项目目录下(git@github.com:yourname/test2.git改成自己的github仓库地址,注意git clone后面有个点,代表拉取到当前目录)
git clone git@github.com:yourname/test2.git .
npm run build
接着添加Node项目

选择PM2项目,添加方式选择"从文件/内容添加",配置文件选择项目目录下的ecosystem.config.js

运行成功后,可以绑定域名来访问

绑定域名后,需要开启外网映射,这样才能在外网访问

8.配置github actions工作流
在本地电脑项目根目录下创建 .github/workflows/deploy.yml 文件,并添加以下内容:
on:
push:
branches:
- main # 只在 main 分支上触发
jobs:
build-and-deploy:
runs-on: ubuntu-latest
steps:
- name: Checkout code
uses: actions/checkout@v3
- name: Set up Node.js
uses: actions/setup-node@v3
with:
node-version: 22 # 使用 Node.js 22
- name: Install dependencies
run: npm install
- name: Build project
run: npm run build
- name: Deploy to Debian Server
uses: appleboy/scp-action@master
with:
host: ${{ secrets.SSH_HOST }} # 服务器 IP 或域名
username: ${{ secrets.SSH_USERNAME }} # SSH 用户名
key: ${{ secrets.SSH_PRIVATE_KEY }} # SSH 私钥
source: "." # 上传整个项目目录
target: "/www/wwwroot/my-next-app" # 服务器上的目标目录
- name: Install dependencies on server
uses: appleboy/ssh-action@master
with:
host: ${{ secrets.SSH_HOST }}
username: ${{ secrets.SSH_USERNAME }}
key: ${{ secrets.SSH_PRIVATE_KEY }}
script: |
cd /www/wwwroot/my-next-app
npm install --production
- name: Restart PM2 process
uses: appleboy/ssh-action@master
with:
host: ${{ secrets.SSH_HOST }}
username: ${{ secrets.SSH_USERNAME }}
key: ${{ secrets.SSH_PRIVATE_KEY }}
script: |
cd /www/wwwroot/my-next-app
pm2 restart ecosystem.config.js --env production
9.添加GitHub Secrets
打开github仓库,点击 Settings -> Secrets and variables -> Actions -> New repository secret


将以下信息添加到 GitHub 仓库的 Secrets 中:
SSH_HOST: 你的服务器 IP 地址。
SSH_USERNAME: 你的服务器 SSH 用户名(例如 root)。
SSH_PRIVATE_KEY: 你的服务器 SSH 私钥。
查看服务器SSH私钥(在第6步配置SSH访问的时候,我们已经生成了公私钥)
10.将github actions工作流文件推送到github上
在本地电脑终端中,执行下面的命令
git commit -m "添加工作流"
git push -u origin main
11.查看github actions执行结果
可以在github仓库Actions中查看工作流执行结果,如果是绿色的对钩,就说明执行正确

有了github actions工作流后,我们再也不用手动构建了,每次修改项目代码后,推送到github上,github actions会自动帮我们构建并重启项目。


